As a guitarist, you know that your tone is more than just a setting – it’s your sonic signature, a crucial element that defines your sound and sets the stage for your performance. One of the most powerful tools in shaping this tone is using an equalizer (EQ), and the MXR 10 Band EQ pedal is a game-changer.
In this guide, we’ll delve into the intricacies of the MXR 10 Band EQ settings, exploring the impact of each frequency range and how you can manipulate them to craft your unique sound. Whether aiming for a punchy mid-boost or a mellow, high-cut tone, the MXR 10 Band EQ pedal offers you the control you need.
Well then, let’s embark on this journey of sonic exploration and discover how you can unlock your guitar’s full potential.
Understanding the MXR 10 Band EQ
I recently got my hands on the MXR 10 Band EQ pedal, and it’s been a game-changer for my guitar tone. In this section, I’ll share my experience with the pedal and explain how it works.
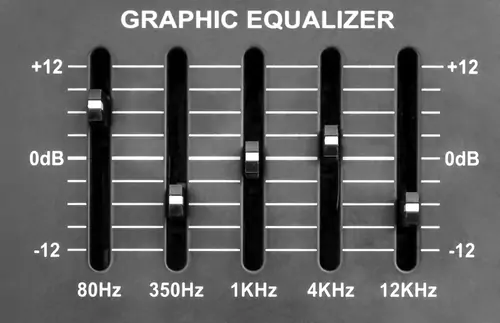
As the name suggests, the MXR 10 Band EQ is a graphic equalizer with ten frequency bands. It allows you to shape your guitar tone by boosting or cutting specific frequencies. The pedal has a level knob that controls the overall volume of the output and a bypass switch that lets you turn off the EQ when you don’t need it.
The MXR 10 Band EQ is easy to use. The pedal has ten sliders that correspond to the ten frequency bands. You can boost or cut each frequency by up to 12dB, giving you much control over your tone. Even small adjustments can make a difference in how my guitar sounds.
The MXR 10 Band EQ is also very versatile. You can use it to shape your tone in a variety of ways. For example, you can boost the mids for a more pronounced lead tone or cut the highs for a warmer, smoother sound. You can also use it to compensate for the acoustics of the room you’re playing in.
The MXR 10 Band EQ is an excellent tool for any guitarist who wants more control over their tone. It’s easy to use, versatile, and effective. Whether playing live or recording in the studio, this pedal can help you achieve your desired sound.
Check out these other posts:
Features of MXR 10 Band EQ
As a guitar enthusiast, I was excited to try out the MXR 10 Band EQ pedal. The pedal is housed in lightweight aluminium housing, making it easy to transport and use on stage. The bright LEDs make it easy to see the settings, even in low-light conditions.
The MXR 10 Band EQ features ten sliders that allow precise tone control. The sliders cover a wide frequency range, from 31.25 Hz to 16 kHz, allowing for fine-tuning of the sound. The output level controls make it easy to match the pedal’s output to the amplifier, while the input and output level controls allow for further signal adjustment.
The footswitch is sturdy and responsive, making it easy to turn the pedal on and off. The second output allows for easy integration into a stereo setup, while the main output can be used for mono configurations. The pedal also features true bypass, ensuring the signal remains unaltered when the pedal is turned off.
Setting Up Your MXR 10 Band EQ
A well-balanced tone and a good set-up go hand in hand. That’s why I always set up my MXR 10 Band EQ correctly.
Here are some tips to help you get started:
First, make sure your signal chain is set up correctly. I like to place my MXR 10 Band EQ after my noise-reduction circuitry, but before any other pedals. This allows me to fine-tune my tone without any unwanted noise or interference.
Next, adjust the level on your MXR 10 Band EQ to match the volume of your amp. This will ensure your tone stays consistent, regardless of how loud or soft you play.
Now it’s time to start dialling in your tone. The MXR 10 Band EQ offers a wide range of frequencies to adjust, so it can initially be overwhelming. I like to start by setting all of the sliders to the halfway point and then making minor adjustments.
One thing to remember is that the MXR 10 Band EQ is very powerful. It can make a big difference in your tone, but it can also be easy to overdo it. I recommend making minor adjustments and listening carefully to how each change affects your tone.
Finally, save your settings once you’ve found a tone you like. This will allow you to easily recall your settings in the future and ensure that your tone stays consistent from gig to gig.
Of course, setting up your MXR 10 Band EQ can be intimidating at first, but with a bit of practice, you’ll be able to dial in your tone like a pro.
Understanding Frequencies
As a music enthusiast, I know that the ability to manipulate frequencies is crucial to achieving the perfect sound. The MXR 10 Band EQ is an excellent tool for adjusting the frequencies of your guitar, bass, or any other instrument. Understanding frequencies is essential to using this tool effectively.
The frequency range of the MXR 10 Band EQ is from 31.25Hz to 16kHz. It is divided into ten bands, each covering a specific range of frequencies. The following is a breakdown of the frequency ranges and their corresponding values:
- 31.25Hz – This range covers the low-end frequencies, including bass and drum sounds.
- 62.5Hz – This range is still in the low-end frequencies but is slightly higher than the previous range.
- 125Hz – This range covers the mid-bass frequencies and can be used to add or reduce warmth to the sound.
- 250Hz – This range covers the low-mid frequencies and is often used to adjust the punch of the sound.
- 500Hz – This range covers the mid frequencies and can be used to adjust the clarity of the sound.
- 1kHz – This range covers the mid-high frequencies and is often used to adjust the presence of the sound.
- 2kHz – This range covers the high-mid frequencies and can be used to add or reduce bite to the sound.
- 4kHz – This range covers high frequencies and can be used to adjust the brightness of the sound.
- 8kHz – This range covers the upper-high frequencies and can be used to add or reduce air to the sound.
- 16kHz – This range covers the highest frequencies and is often used to add or reduce the sizzle to the sound.
It is essential to understand that each range has a specific purpose and can be used to adjust the sound in different ways. The MXR 10 Band EQ also has high pass and low pass filters that can cut off frequencies below or above a particular range.
Tuning Your MXR 10 Band EQ

I’ve been using the MXR 10 Band EQ for quite some time now, and I’ve found that it’s an incredibly versatile tool for shaping your guitar tone. Here are a few tips for tuning your MXR 10 Band EQ to get the most out of it.
First off, it’s important to remember that the MXR 10 Band EQ is not a magic fix-all for your tone. It’s a tool that can help you tweak and fine-tune your sound, but it won’t make a bad amp or guitar sound amazing. With that in mind, let’s dive into some specific settings.
When using the MXR 10 Band EQ, I like to start with all the sliders at 0 and then make adjustments from there. I typically start with the gain slider, which can add some extra grit and distortion to your tone. If you want a cleaner sound, leave the gain at 0.
Next, I’ll adjust the low and high pass filters to shape the overall frequency response. The low pass filter can help tame any harsh high-end frequencies, while the high pass filter can help eliminate unwanted low-end rumble. I usually set the low pass filter around 6-8k and the high pass filter around 100Hz, but this can vary depending on the specific guitar and amp you’re using.
One of my favourite features of the MXR 10 Band EQ is the “warmth” slider, which can add extra body and fullness to your tone. I typically set this around 200Hz, but this can vary depending on your specific setup.
The “crunch” slider can add some extra midrange punch and saturation to your tone, while the “clean boost” slider can give you a bit of additional volume and clarity. Use these sliders sparingly, as too much of either can quickly make your tone sound harsh and overdriven.
Remember to use your ears when tuning your MXR 10 Band EQ. There’s no one “correct” setting that will work for everyone, so experiment and find what sounds best to you. And don’t forget to adjust the output volume to match the level of your guitar and amp.
Finally, if you’re looking for even more control over your tone, consider pairing the MXR 10 Band EQ with an Empress ParaEQ. The two pedals work great together and can give you incredible flexibility and control over your tone.
Addressing Noise Issues
When it comes to using an EQ, one of the most common issues people face is noise. Sometimes, the EQ can introduce hiss or another unwanted character into the signal or muddy the mix. As someone who has spent much time using the MXR 10 Band EQ, I’ve encountered these issues myself. Here are some tips for addressing noise issues:
It’s important to understand that some noise is inevitable when using an EQ. There are steps you can take to minimize it. One option is to use a noise gate. This can be useful if you’re using a high-gain setting on your amp, as it can reduce the amount of noise.
Experiment with different EQ settings. Some frequencies can introduce more noise than others. If you’re experiencing noise issues, try reducing the gain on the high frequencies and see if that helps.
It’s also worth considering the gear you’re using. If you’re using a noisy pedal or amp, getting an utterly noise-free signal will be difficult. However, there are some things you can do to minimize the noise. For example, placing a noise gate or noise reduction pedal before the MXR 10 Band EQ can help to reduce the amount of noise that’s introduced.
In some cases, using a noise reduction box can also be helpful. These devices are designed to remove unwanted noise from your signal and can be particularly effective if you’re using a lot of pedals or other gear in your setup.
Many factors can contribute to noise issues when using an EQ by experimenting with different settings, gears, and noise reduction tools.
Specific Uses of MXR 10 Band EQ
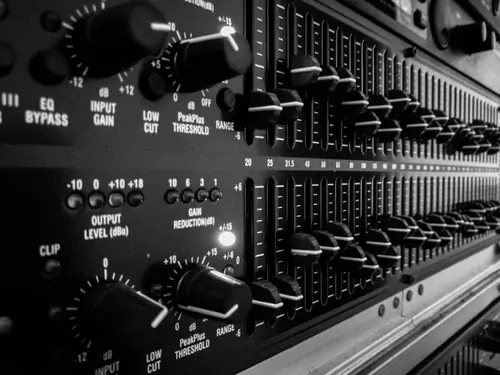
The MXR 10 Band EQ is an indispensable tool for shaping tone. The pedal’s tone-sculpting ability allows me to fine-tune my sound to perfection, and it has become a permanent fixture on my crowded pedalboard.
One of the most common uses of the MXR 10 Band EQ is as a solo boost. Setting the pedal to boost specific frequencies allows me to make my guitar stand out in the mix and cut through the band. I often use it to add some extra midrange and treble for solos, which gives my guitar a more aggressive and cutting tone.
Another excellent use for the MXR 10 Band EQ is in the effects loop of my amplifier. By placing it in the effects loop, I can shape the tone of my entire signal chain, including any effects pedals in front of the amp. That allows me to get a consistent tone, regardless of what effects I’m using.
The MXR 10 Band EQ is not just for guitarists, though. Bass guitar players can also benefit from its tone-sculpting abilities. By boosting the low end and cutting some of the midrange frequencies, bass players can get a warmer, more rounded tone that sits perfectly in the mix.
Even amplified acoustic guitars can benefit from the MXR 10 Band EQ. By boosting the high end and cutting some of the low frequencies, I can get a more natural and balanced tone that sounds great through a PA system.
The MXR 10 Band EQ is an incredibly versatile pedal that can be used in various ways. Whether you’re a guitarist, bass player, or acoustic musician, it can help you achieve the perfect tone for your instrument.
Frequently Asked Questions
This won’t be a comprehensive resource if you don’t get the answer to the most popular questions. Let’s get in.
What are the frequencies of the 10-band EQ?
The MXR 10 Band EQ has 10 frequency bands ranging from 31.25 Hz to 16 kHz. The frequency bands are as follows: 31.25 Hz, 62.5 Hz, 125 Hz, 250 Hz, 500 Hz, 1 kHz, 2 kHz, 4 kHz, 8 kHz, and 16 kHz.
Is MXR 10 band EQ noisy?
The MXR 10 Band EQ is designed to be as quiet as possible. However, like any piece of equipment, it can introduce noise into your signal chain if not set up properly. It is recommended to use high-quality cables and power supplies to minimize any potential noise.
What are the best EQ settings for rhythm guitar?
The best EQ settings for rhythm guitar will depend on the specific guitar, amplifier, and playing style. However, a common starting point is to boost the low mids around 250 Hz for warmth and body, cut the high mids around 2 kHz to reduce harshness, and boost the highs around 8 kHz for clarity.
How do I set up my MXR 10 band EQ?
To set up your MXR 10 Band EQ, connect it to your guitar and amplifier using high-quality cables. Then, set all the sliders to the middle position and play your guitar. Adjust the sliders to your liking, experimenting with different frequencies and levels until you achieve the desired sound.
MXR 10 band EQ black vs silver?
The MXR 10 Band EQ is available in both black and silver finishes. The black version is the newer model with a slightly different circuit design, resulting in a somewhat different sound. However, both high-quality versions offer the same ten frequency bands and level controls.
MXR 10 band EQ review?
The MXR 10 Band EQ is a versatile and high-quality EQ pedal that can help you shape your guitar tone to your liking. It offers ten frequency bands and level controls, allowing for precise and detailed adjustments. Overall, it is a wonderful addition to any guitar rig and is highly recommended.

My name is Howard Matthews and I have been playing the guitar since I was knee-high. My parents like to joke that I was pulling the strings even before I was born. In fact, one of my earliest memories is sitting on the couch with my dad’s guitar, wreaking havoc on the chords.
Now, 40 years later, I can attest that I play them much better than I did back then. I have followed in the footsteps of both my parents – much to their delight – and have been the main guitarist in my band for the best part of three decades.
Music has always been my passion, and until recently my life has been so consumed with it that I haven’t had a moment to have a breath (and I wouldn’t have it any other way)!

